
Learning how to crochet a fall leaf is such a simple way to add to your home decor during this autumn season. I love how little details like this crochet pattern can really bring so much coziness into your home. Plus, this pattern is perfect for the beginner crocheter who just wants an easy crochet project for fall.
An autumn leaf is a simple crochet project that can be made in under 10 minutes. How you use them will decide how many you need, but I love having those perfect stash buster patterns that help me use up leftover yarn in a beautiful way!
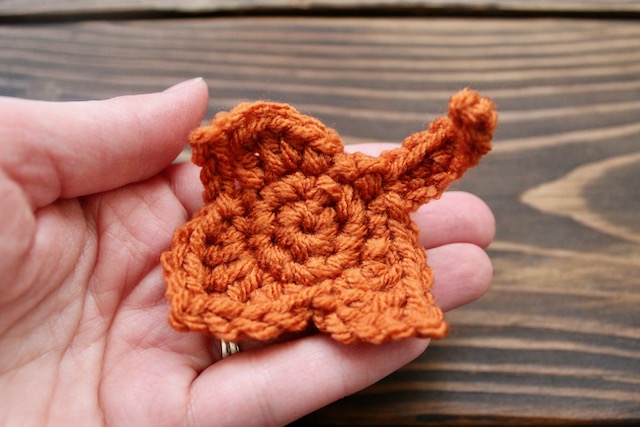
The fall leaf pattern below is a beginner level crochet pattern that can really make a statement. Whatever level of crocheter you are, you’ll enjoy having this fall crochet leaf pattern on hand for each autumn season!
Pin me for later!

Some ways to use this pattern:
Decorate crochet pumpkins!
If you are like most crocheters, then you probably have tons of crochet pumpkins all over your home this time of year (Check out my Mini Moss Pumpkin or my Baby Pumpkin patterns if you haven’t!). These fall crochet leaves are a fun way that you can add some decor to those pumpkins!
Crocheted coasters!
Coasters are a simple addition to your coffee or end tables, and you could definitely use this pattern to make some fall themed ones! Personally I would use some cotton yarn doubled up and a larger hook to do so, but the directions would be the same.
Hostess gift decor!
Tis the season for all the holiday parties! Can you imagine bringing a hostess gift decorated with a little crocheted fall leaf? Sounds pretty cute to me. Plus, it would take you way less time than actually wrapping it, if you are anything like me!
Fall Leaves Wreath!
I know that wreaths are a beautiful way to add some decor right to your door, and these crochet fall leaves would be such a fun way to create your own! You could even crochet a bunch in lots of colors to really make it stand out.
Create a Falling Leaves Garland!
The Falling Leaves Garland is such a fun fall pattern to use in your home, classroom, or wherever you want to add some festive flair. I personally love having mine right in my living room, but you could easily add it to a bedroom or even wrap it around a stair banister.

Want more crochet in your inbox? Sign up below!
How to Crochet a Fall Leaf:

Supplies:
- 4 yards of Worsted Weight Yarn
- H/8 5mm Crochet Hook
- Yarn Needle
- Scissors
Gauge:
Because the leaves are so small, there isn’t a way to get a proper gauge. The size of my leaves though are 2.75-3 inches across from Leaf Point 1 to Leaf Point 3. You don’t need an exact size since type of yarn will make a slight difference. However, if your leaf is too large, you can size down your hook, and if it is too small, then you can size up your hook as needed.
Notes:
- st – Stitch
- ch-Chain
- sc – Single Crochet
- hdc – Half Double Crochet
- dc – Double Crochet
- tr – Treble Crochet
- sl st – Slip Stitch
-Written in US terms.
-Chain at the beginning of rounds does not count as a st.
-Repeat the directions in the asterisks (*) across the row.
-Total st count for each round will be in the parentheses.
–Custom sizing: If you wish to make larger leaves, you can size up your hook and double up your yarn. The leaf may be slightly stiffer, but the pattern directions should work just fine.
Crochet Fall Leaf Video Tutorial:
Directions:

–Round 1: Create a magic ring, and sc 6 into the ring. Join the ring with a sl st (6).


–Round 2: Ch 1, sc twice in each st from Row 1 , and join with a sl st (12).
–Round 3: Leaf Points
Leaf Point 1: sc in first st, hdc and dc in the next st, tr in the next, ch 2, sl st into the first ch to make a point, ch 2 again, and sl st into the st next to the tr.


Leaf Point 2: ch 1, hdc and dc in the next st, tr in the next, ch 2, sl st into first ch to make a point, tr again in the same st as the first tr of this leaf, dc and hdc in the next st, sl st into next st.


Leaf Point 3: ch 5, sl st into the 4th ch, tr into the next st, dc and hdc into the next st, sc in the next, sl st in final st of Row 2.


Stem: ch 6; sc in 2nd ch from hook and in each st back to leaf (5); sl st into the same base st of the ch. Fasten off, and weave in ends.

You’re Done!
That’s really all there is to making your own fall leaves! I hope you enjoy this crochet pattern, and please make sure to tag me on Instagram @godsgiftofcreativity to show me how your lovely fall leaf turned out. I can’t wait to see it!
I hope you enjoyed this blog post! Please like and subscribe to my blog if you would like to see more content like this, and share with others! If you want to keep up with me on Instagram or Facebook, you can find me @godsgiftofcreativity on either platform.
Thanks for creating with me!
-Chelsey
Hi there! I’m Chelsey!
Welcome to my blog God’s Gift of Creativity! Join me as I share my love for crochet, crafts, and cooking and show you how you can do it too!


Leave a Reply