
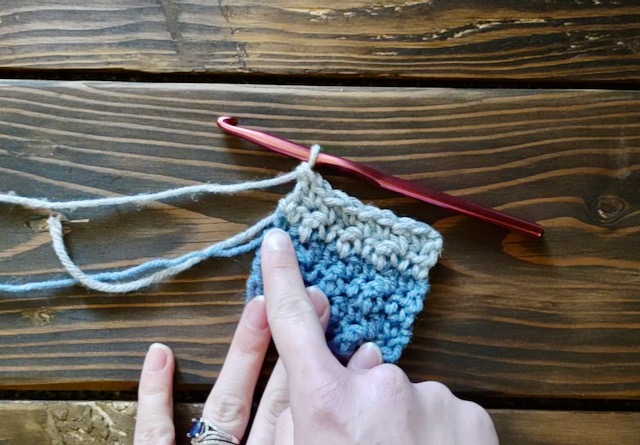
In crochet projects, it can be so much fun to add multiple colors, or color change, to create the design we want. However, knowing how to change colors so that the transition is seamless can be confusing for a beginner. Once you understand the basic process of changing colors though, it can be very quick and easy to do, and then you can create as many multi-colored projects as you desire.

When first starting to crochet, I learned how to use just one color for each project. As I grew in my skills, I started trying to incorporate more than one color in a pattern. Most of the time, it wasn’t pretty at all, and often I could see the transition clearly in one stitch. It took me a long time and a lot of practice before I really understood how to create seamless transitions. Plus, the transition method below does not take a lot of extra skill to complete. It is just knowing when switching yarn colors is needed. That’s it!
Now, before I begin, I do want to explain that crocheters and designers sometimes have unique ways of accomplishing the same goal. If you try out my way and it doesn’t work for you, no problem. You may want to try another way. The goal of switching colors is the same even if the technique is different. Also, there will be times that pattern designers require you to color change a specific way in order for the pattern to turn out right. In these cases, you always should try out the specified technique first since that is how the pattern was designed.
For beginners, you will need to understand some crochet terminology. The creation of an individual stitch can be broken down into steps, and the final “yarn over and pull through” to complete the stitch is the main focus of what I will be teaching you today. If you are not sure what I mean, then I recommend reviewing the stitch you are using in your project because it should be the final step to complete the stitch. I have an example of how to transition, or “color change” as it is called in most patterns, in the video below if you want a visual of the steps in action.
Beginners should be able to change colors at the end of a row with little difficulty since it is a simple yarn switch. However, you could use this same technique in the middle of a row, fasten off the end of your first yarn color, and then weave in the end on the same color side. This is just an option for you if you want to up your color changing game.

Want more crochet straight in your inbox? Sign up below!
How do you change color in the crochet chain?
To change color in the crochet chain, you will actually use the same method that I explain here. You will need to yarn over and pull through with the second color of yarn. I find that this is easier to complete when you hold the chain and yarn tightly for several chains after your transition stitch.
How do you change colors in crochet without cutting the yarn?
You can change colors in crochet without cutting the yarn, or fastening off. This requires that you carry the yarn, which can be difficult for beginners, and I don’t find that it always ends up with as clean of a look as when you fasten off. However, you can carry the yarn by keeping it attached to the project, and then pulling it up to the spot where you would like to use it again and color changing back to the first yarn color. When you do so, you will need to make sure to keep the yarn at a tight tension, but not too tight that it curls the project.

What do you need to know:
The very basic stitches that you should know are:
-Chain
-Your stitch (whatever stitch you are using in your project)
That’s really it! This technique is super simple, and as long as you feel comfortable with the above two stitches, then you should be ready to go. If you are a complete newbie to crochet, then I recommend checking out the posts Crochet: Some Basics and Single Crochet and Double Crochet Tutorial to get you started.
Supplies:
For this crochet skill, you really just need:
-Crochet Hook
-Yarn in 2 Colors
If you are already working on the project, then perfect! You are ready to go! However, if you have not started yet, then just know these are the basics of what you will need to complete this color change technique.
Notes and Tips for Color Changing at the End of a Row:
-Try not to hold either yarn too tightly or too loosely when you are completing the final pull through for the color change. If the yarn is too tight, it will end up making the final stitch of the row very small and hard to crochet into later. If the yarn is too loose, the stitch can be too large and create an uneven texture and even draw attention to your transition.
-You can go back and tighten up the stitch by pulling on the yarn ends coming from it. I do this until the stitch is even with the previous stitch.
-After you complete the color change, you should not see the second color as part of the stitch. You should only see it as a loop pulled through it.
–Color change is usually abbreviated cc in patterns, but always check the notes section for confirmation.
How to Color Change at the End of a Row:
Complete the row (or number of stitches needed prior to the color change) until the final stitch.

Crochet the final stitch until the final step. For the final “yarn over and pull through” step, you will yarn over with the second yarn color and pull through.


Pull gently on the yarn ends to ensure the stitch is consistent in size with the previous stitch.

Crochet your turning chain (or continue on down the row) using the second color of yarn. You can fasten off the first yarn, and weave in the ends.

That’s it! I really love using this crochet color change technique for in the row because of how simple and quick it is to complete. Plus, it is a lot easier for me to remember than some more complicated ways that I have found. I hope this tutorial helps you add some more colors to your crochet projects and keeps those transitions smooth and seamless.
I hope you enjoyed this blog post! Please like and subscribe to my blog if you would like to see more content like this, and share with others! If you want to keep up with me on Instagram or Facebook, you can find me @godsgiftofcreativity on either platform.
Thanks for creating with me!
-Chelsey
Hi there! I’m Chelsey!
Welcome to my blog God’s Gift of Creativity! Join me as I share my love for crochet, crafts, and cooking and show you how you can do it too!


Leave a Reply