
Homemade soap is easy to make with melt and pour bases, and it is a fun, kid-friendly project that can be quick to complete. You can create unique fragrances and choose ingredient combinations that your family will love, and it doesn’t take a lot of special knowledge or supplies. Whether you want to make soap for yourself or gifts, this DIY project is a fun and creative way to make something you need with your own two hands.

Summer thunderstorms are a perfect time for some quick and easy indoor DIY projects! Melt and pour soap is just the thing. I love to create useful and fun items for my home, and this soap definitely hits the bull’s eye on both marks!
What is really fun about melt and pour soaps is that you can customize pretty much everything to fit you. Do you want to get away from synthetic fragrances? You can do that! Would you prefer shea butter to coconut oil? You can pick your favorite base! Do you love a certain custom scent? Awesome! You can put it in your soap! The options are many, and as long as you follow these few steps, you will be able to create your own melt and pour soap in no time.
Don’t forget to pin this post!

Love all things crafty? Sign up to get them in your inbox!
How long does melt and pour soap take to cure?
Melt and pour soap is ready to use right after you let it harden up. This is because the melt and pour base has already been cured, and therefore, all you have to do is melt the base, mix whatever add-ins and scents you wish, and pour it into molds to let it harden up. Once it has hardened, you are able to use it right away!
Where can you buy melt and pour soap base?
Personally, when looking for melt and pour soap base, I have found several different types that I have enjoyed at Michael’s and Hobby Lobby along with different molds, fragrances, and even some colors. These would be perfect for you if you are a beginner who is just getting started and are unsure of what you want. However, if either of those options are not accessible to you, I am sure you could easily find some on Amazon or via many other online retailers. When you start looking, I would decide ahead of time what type you might like to look at (like shea butter, goat’s milk, etc.) to help you focus your search. Always check the reviews before purchasing to get an idea of the quality of the product!

Which melt and pour soap is best?
Honestly, you will have to determine which melt and pour soap is best by how you are planning on using your soap (e.g. in the kitchen), and what do you like most in a soap. Some considerations might be how well the soap will lather, how well it might moisturize your skin, how it was resourced, where can you get it, or even if it is vegan or not, plus other factors that might be important to you. All of these factors will help determine which melt and pour soap is best for you and your family. For example, in our family, we use the shea butter melt and pour soap base because it helps moisturize our skin, works well with the scents and add-ins that I use, and is readily available locally.
What makes melt and pour soap lather more?
When you are making melt and pour soaps, you need to know that tips for lather are more about what the soap is made out of, using more friction, and using the right water than adding extra ingredients. You want to pick a base with ingredients that naturally create more lather, such as soap bases with higher glycerin or sorbitol in them. Know ahead of time that hard water will limit the amount of lather that any soap will form. Don’t forget to scrub up a little more with added friction when you are using your soap just to get the bubbles going! (Source)

Supplies:
-1lb. Melt & Pour Soap Base of Choice
-20-30 drops of Essential Oil(s)
-1 oz. Rubbing Alcohol
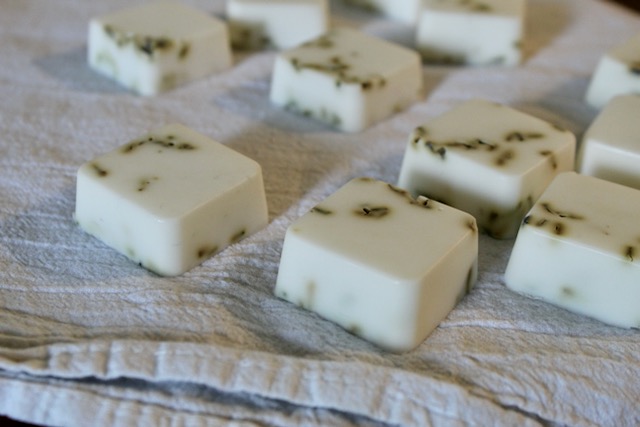
-1/4 c. Dried Herbs or Other Add-Ins (optional) – I used dried lavender. (E.g. Sugar, coffee grounds, oats, or other dried herbs would be great!)
-Soap Mold(s), Cleaned & Dry
-Spray Bottle
-Cutting Board
-Sharp Knife
-Glass or Microwave Safe Bowl
-Spatula/Wooden Spoon
-Pot or Microwave
How to Make Melt & Pour Soap:

You will need to start by cutting the soap base into chunks and placing them in the glass bowl. You will want them to be somewhat uniform in shape, but they do not need to be small. My chunks were about 1.5 to 2 inches in size.

Next, you’ll need to melt your soap base. You can do this by placing it in the microwave on high for 30 second increments and stirring in between time chunks. Another option though is to create a double broiler effect by heating a pot of water on the stove on medium low and placing the glass bowl over the top. Then the heat will slowly melt the soap base.

While you are waiting for the soap to melt, use the spray bottle to spray the rubbing alcohol over the mold. You don’t need it wet, but you want a light spray in each space. If you want to get fancy and are using add-ins, you can put some into the bottom of the mold as well.
Once the soap base is melted, you can add your essential oils and the rest of your add-ins, if using any, to the melted soap. Stir them in immediately and gently, and try not to create bubbles as much as possible because your soap will quickly start to harden as it cools.

As soon as you have stirred everything together evenly, pour your soap into the molds. As soon as you have done this, wiggle the mold slightly to bring any air bubbles to the top, and then spray some rubbing alcohol over the top to get rid of them before the soap sets.
Leave the soap to set for 10-12 hours at room temperature, or you can place the mold in the fridge or freezer for 2-5 hours. The time it takes for your soap to set will depend on the size and thickness of your molds, temperature of your room, and the add-ins you chose, if any. I generally just use one of my soap bars as a test, and make sure that it pops out clean and easy before I try with any others.

Enjoy your homemade soap!
I hope you enjoyed this blog post! Please like and subscribe to my blog if you would like to see more content like this, and share with others! If you want to keep up with me on Instagram or Facebook, you can find me @godsgiftofcreativity on either platform.
Thanks for creating with me!
-Chelsey
Hi there! I’m Chelsey!
Welcome to my blog God’s Gift of Creativity! Join me as I share my love for crochet, crafts, and cooking and show you how you can do it too!


Leave a Reply