
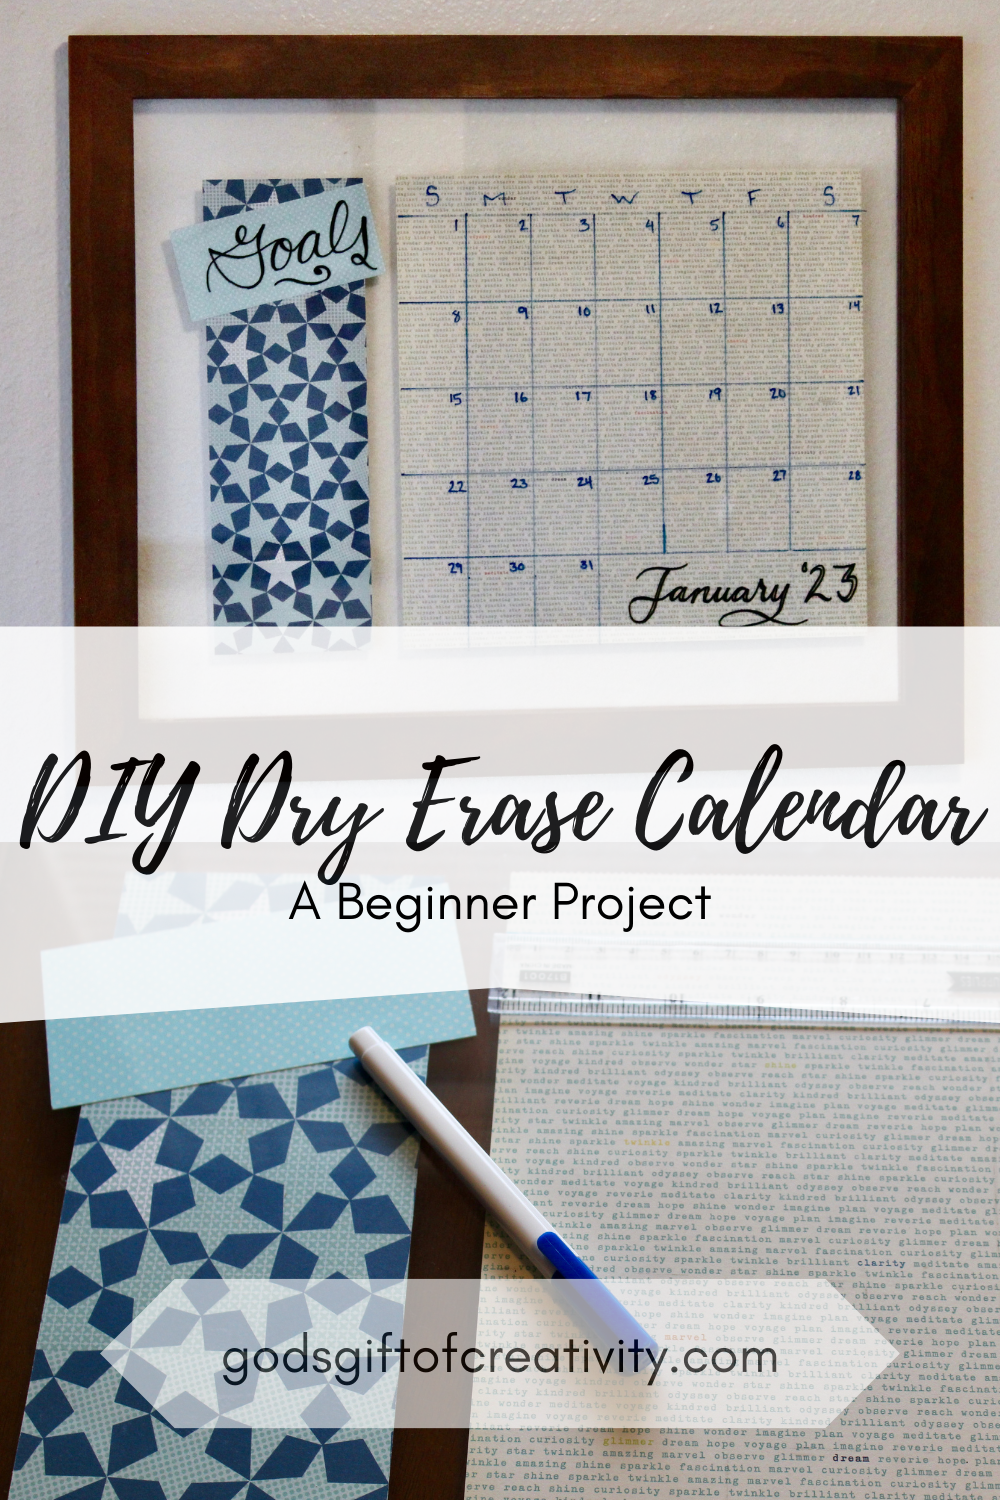
The DIY Dry Erase Calendar is an easy craft project that will help organize your plans. The steps are simple to follow and you can personalize your calendar to your heart’s content! All you need is a frame, some fancy paper, a few dry erase markers, and a ruler to create your own dry erase calendar.

The beginning of every new year typically sees people starting some new habits or routines to help them grow, learn, overcome, or accomplish goals and resolutions. For me, I’ve been pondering my life as a mom and trying to create goals and routines or habits that will help me stay sane and maintain my priorities. One of these priorities has been to stay organized with events and daily activities. In the past, I have kept a personal planner to keep track of everything, and while I will continue to use this, I want to be better at communicating events with my hubby, especially when considering our little one.
Every person knows that communication is key to any relationship and that is especially true when you are trying to figure out who is going to watch the baby when you both have something planned. Anyone else ever have this problem?
While I love spending time with my little guy, it isn’t always possible for me to bring him everywhere. Anywhere I can take him with me, I definitely do, but sometimes it just isn’t in the cards. Plus, you know that momma needs a break occasionally.
Anyways, a step I have decided to take to help with family planning has been to hang a calendar on the wall in the dining room of our home. This is a major traffic area where the calendar will be easy to see as we go about our days. My goal is to keep all of our events, appointments, and plans on there so that we both know what’s going on and can add or erase events, notes, or whatever is needed.
I decided to go with a dry erase option because then I could use it for many years to come, and I don’t have to worry about trying to buy or print a new calendar each month or year. However, because I love DIY projects (as you may have noticed) and I did not love the look or prices of the dry erase boards at the local stores, I decided I would make my own!
My new DIY Dry Erase Calendar is so much fun to customize, and it works great! The dry erase wall calendar really does not have to take long to set up. As a bonus, you can create your own with some pretty simple supplies or really go all out and make it fancy. It’s all up to you and what style you want to create!

What do you need to make your own dry erase calendar?
- Wall Space: I highly suggest finding the spot you want to hang you homemade dry erase calendar first so that you make sure to get a frame that will be the right size for the space.
- Large Frame: I used a 20 inch by 16 inch double-glass panel frame, but you could easily use a regular frame of that size as well. I will explain how to use both in the instructions. If you use a different sized frame, you will want to use one that fits well in the space you have, but also is large enough to fit all of the pieces.
- Paper: You can use plain paper, colored paper, or decorative paper. I used a 12 inch square of decorative paper for the calendar piece and a 12 inch by 4 inch rectangle for my extra section. I like to change the pieces out for the seasons or holidays, but you can go more simple or whatever fits your style if you’d like too.
- Dry Erase Markers or Chalkboard Pens: I used fine point dry-erase markers to make it easier to write in smaller spaces. However, if you are using a dark color of paper, chalkboard pens will be easier to see.
- Double-Sided Sticky Tape: This will help keep the paper from moving around too much when placing it back in the frame.
- Double-Sided Ruler: You will need this to measure out the sections of your calendar.
- Finishing Nails and Hammer: You need these to hang your frame.
- Cricut (or similar machine) – optional: If you really love the layout that you make, you can use the Cricut to cut out the pieces and stick them where you wish on the frame to make it permanent. I’ll explain further in the notes and tips section below.

Notes & Tips:
-I love to change the layout of my calendar depending on the season or events we have going on in our lives. As a result, I don’t use vinyl cut outs very often unless I really love something. You can cut out a decoration or the entire set up and place in on the glass front if you prefer, but I find it can often take more time than simply drawing it out. However, if you love using vinyl and don’t want to change anything, then go for it!
-I love the double glass frame because it makes it easier to change the layout of the paper sections for my dry erase calendar, which lets me be more creative in how I set it up! You could easily use a regular frame and simply change out the background as well if that is easier for you.
-I suggest hanging a little basket or hanger next to the calendar where all of the dry erase markers and eraser can go just to make it that much simpler to add or erase anything.
-If you want to make this a magnetic board, you can buy a thin sheet of galvanized steel or other magnetic sheet metal that fits your frame size, and place it in the frame after the paper so that it is behind your paper layout. These are often found at hardware stores but could possibly be found at some craft stores as well.
-Feel free to customize the calendar sections to fit how you schedule things. For example, some people plan things week by week more so than day by day. If so, I suggest just sectioning out the rows or columns for weeks and labeling them instead of going through the whole process in the directions.
How do I create a dry erase calendar?
Step 1: Take the frame backing or back glass pane off the frame.

Step 2: On the backing or back pane, arrange the paper how you would like it to show up in the frame. (Note: If you are using a regular frame, you will need a background piece of paper to cover the backing, or you could make a layout that covers the entire backing.)
Step 3: Take 2 pieces of double sided sticky tape per piece of paper and place under the opposite corners of both pieces of paper. You just want it to hold the paper in place, so you don’t need much.

Step 4: Replace the paper on the glass in the layout you chose. Put the backing or back glass pane back into the frame and secure.

Now you have your background set up inside your frame. Next, we draw, label, and decorate the calendar and extra sections! (Or, if you are using a Cricut machine, you can do so instead!)

Step 5: Using the centimeter side of your ruler and starting with the large square section of paper, measure and mark 2cm from the top and draw a horizontal line at that mark. This section is where you can put the days of the week.

Step 6: Laying the ruler horizontally across the square right along the previous line, you will break the square up into 7 equal sections by marking at approximately every 4.3cm. (Note: This does not need to be exact, but you will want to be close. Remember, these are the measurements for a 12 inch paper square!) Repeat this at about the half way point and close to the bottom. Then line up the points that correspond vertically along the ruler and draw a line through them from the top of the square to the bottom. Do this with each set of three dots, and you should have 7 columns. (Note: If you are simply wanting to separate the weeks, you could stop at this step.)

Step 7: Now lay the ruler vertically from the top line to the bottom of the square. To split up the columns into 5 rows, you will mark approximately every 5.6cm from the top line down. Repeat this on both sides of the square. Then line up the two points that correspond horizontally with the ruler and draw a line through them both from one side of the square to the other side. Continue doing so with each pair of corresponding dots, and you should have 5 rows at the end of this step.
Note: If you are creating a calendar that needs 4 rows or 6 rows, you can simply divide the number of centimeters or inches that you have under the top row (it should be about 28cm) by the number of rows you need. (e.g. 28/4=7cm) This would be the height of the rows instead of 5.6 cm.

Step 8: Finally, fill in the days of the week, dates, and month and any other drawings or details you choose, and your calendar is ready to go!

Step 9: Extra Section: I love using this extra section as a goals section, but it would be a great spot for a to-do list, menu, shopping list, or anything else you might need it for.
I hope you enjoyed learning how to create your own DIY Dry Erase Calendar with just a few simple supplies! If you created your own version of this DIY project, I would love to hear from you! You can connect with me via Instagram or Facebook @godsgiftofcreativity or leave a comment below. Also, if you enjoyed this content, please like and subscribe to my blog so you can get updated every time a new blog post goes live!
Thanks for creating with me!
-Chelsey
Hi there! I’m Chelsey!
Welcome to my blog God’s Gift of Creativity! Join me as I share my love for crochet, crafts, and cooking and show you how you can do it too!


Leave a Reply