
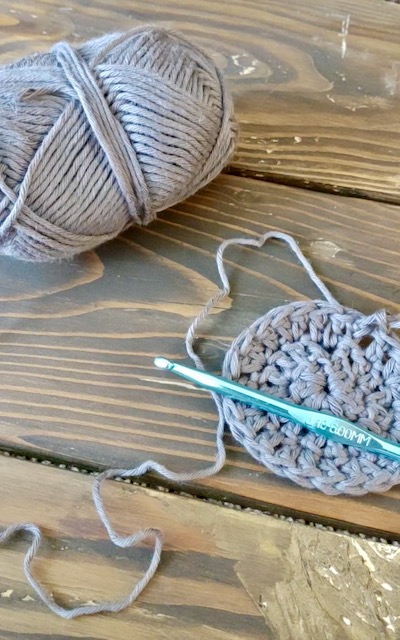
Crocheting in the round is an essential skill for any crocheter who wants to crochet in circles or circular shapes. Many patterns and crochet styles require this knowledge to be successful, and while it does take some practice, it is not a complicated process. When we learn how to crochet in the round, we are able to push past beginner level rectangle or square shaped patterns and move to more complicated projects.

Crocheting in the round is one of the most useful skills a beginner crocheter can learn in my opinion. Once you have a handle on how to crochet in the round, your list of project opportunities expands at a phenomenal rate! What you will be learning today are the basics of what crochet in the round is, how to crochet in the round, and some tips to help you avoid making mistakes when crocheting in the round.
Just as a heads up, in my video, I explain and crochet a flat circle shape as an example. While this is not the only way to crochet in the round, I find this concept is easier to learn when there is context to refer back to, and joined circles are the most common way people start out learning this concept. However I will be explaining how to crochet a cylindrical shape as well for your reference.
Don’t forget to pin this post!

This post contains affiliate links, which means I make a small commission if you make a purchase at no extra cost to you. If you do make a purchase, thank you! You rock! If you have a question, see my full disclosure here.
Love crochet? Join my email list!
What is crochet in the round?
Crocheting in the round simply means to crochet in a circle, or circular shape. This might mean you crochet in a cylinder, a spiral, or just a flat circle. In many cases, such as a cylinder shape, you only need to build up and join (or not join) the rounds as you go. At other times, like a flat circle, you will need to know how to increase in each round so that your project comes out the way you want. When you are following a pattern, they will tell you when to join (if you do) and how to increase, but when you are experimenting on your own, it is necessary to understand the basics.
What do you need?
To learn this crochet skill, you will just need the following:
-crochet hook
-yarn
-stitch marker (not always)
I suggest you use a crochet hook that matches the yarn weight recommendations until you feel confident crocheting in a ring. Start with a yarn and hook combination you’re comfortable with first, and get to practicing!
What you need to know:
You should know how to complete these basic stitches and techniques:
–chain,
–single crochet & double crochet,
If you are new to any of these, please click on the link above to find the tutorial!

How to Crochet a Cylinder in the Round
Joined Rounds:
When you crochet a cylinder shape with a straight seam (a.k.a. joined rows), there are only a few steps you need:
- Chain to the desired circumference you desire.
- Being careful not to twist, slip stitch to the first chain you made.
- Chain 1, and then single crochet in the same stitch, and then in each stitch around.
- When you have single crocheted in the last stitch, slip stitch to the first single crochet to close the round. The slip stitch is how you join the round.
- Repeat steps 3 and 4 the desired number of times. Then fasten off and weave in ends.
You can also create a cylinder with no seam, but it will spiral around instead. This is often stated in a pattern by the terms “continuous rounds” or by simply stating “do not join”.
Continuous Rounds:
To work in continuous rounds, you simply need to omit the slip stitch and chain 1 steps at the end of the round. Instead, move from one round to the next continuously. The best way to find when you start a new round is to mark the first stitch of the round with a stitch marker, and then you can remove and replace it each time you crochet into it.
How to Crochet a Flat Circle in the Round
Joined Rounds:
When you crochet a flat circle with a straight seam like the one in the video, there are a few steps to remember:
- You will need to create a magic ring or the alternative.
- Round 1: Chain 2 (this counts as a double crochet stitch here and for each round); then double crochet 7 more stitches into the ring. You should have 8 stitches total.
- Slip stitch to the top of the chain 2 from the beginning. You have completed your first round.
- Round 2: Chain 2; then double crochet into the same stitch that the chain 2 is in.
- Double crochet 2 times in each stitch from the previous round. You should have 16 stitches total.
- Slip stitch to the top of the chain 2 from the beginning. To continue to further rows, check out the table below.
| Row Number | Directions to Repeat Around | Total Stitches |
| 3 | Double crochet 2xs in first stitch, double crochet once in next | 24 |
| 4 | Double crochet 2xs in first stitch, double crochet once in next 2 stitches | 32 |
| 5 | Double crochet 2xs in first stitch, double crochet once in next 3 stitches | 40 |
When you crochet a flat circle in the round, you want to remember that each round will increase by whatever number of stitches was in the first round. In the example, we started with 8 stitches in the first round, so we always increase by 8 stitches. To accomplish this, you won’t add anymore increase stitches, but you will add one more double crochet stitch in between the increase stitches for every row.
Continuous Rounds:
- Create a magic ring or the alternative.
- Round 1: Chain 2 (this counts as a double crochet stitch) & place a stitch marker; then double crochet 7 more stitches into the ring. You should have 8 stitches total. You have completed your first round.
- Round 2: Then remove the stitch marker, double crochet twice into the same stitch. Place stitch marker in the first stitch. Double crochet 2 times in each stitch from the previous round. You should have 16 stitches total.
- To continue to further rows, check out the table below. Be sure to remove and replace the stitch marker in the first stitch of each round to help you keep track of your rounds and stitches.
| Row Number | Directions to Repeat Around | Total Stitches |
| 3 | Double crochet 2xs in first stitch, double crochet once in next | 24 |
| 4 | Double crochet 2xs in first stitch, double crochet once in next 2 stitches | 32 |
| 5 | Double crochet 2xs in first stitch, double crochet once in next 3 stitches | 40 |
Crochet a Flat Circle in the Round Video Tutorial:
Tips for When You Crochet in the Round:
-I highly suggest counting your stitches while crocheting and at the end of each round carefully. This can avoid a lot of issues and ensure you are successful with your project.
-When you are crocheting your first round for a circle, you will need to insert your hook into the center of your ring instead of into a base chain. For beginners, this can take a little practice, but the technique is the same.
-When you are first learning how to crochet in the round, be sure to know where your first stitch of the round is (you can mark it with a stitch marker), and be sure to not crochet into the slip stitch from the previous round if working in joined rounds!
FAQs for Crochet in the Round:
Why does my crochet round curl or get wavy?
This will happen usually for two reasons. First reason is that your tension is really inconsistent, which can be fixed with practice and blocking. The second option though is because you put too many or too few increase stitches (two stitches in one stitch from the previous row). If you have too many, you will end up with wavy sides. Too few, your project will probably curl. Unfortunately, you will have to frog and try again in most cases to get the nice flat circle.
How do you crochet in the round without a seam?
To crochet in the round without a seam, you will need to simply skip the joining method at the end of a round, usually a slip stitch and chain 1. Instead, you will crochet in continuous rounds without joining. This will eliminate the seam.

How do you crochet in the round with a straight seam?
To crochet in the round with a straight seam, you will need to join your round with a slip stitch, chain 1 (or however many), and then crochet into the same stitch as you slip stitched into, which should be the first stitch of the previous round. This will keep the seam in a nice neat line for your circle or cylinder.
I hope you enjoyed this blog post! Please like and subscribe to my blog if you would like to see more content like this, and share with others! If you want to keep up with me on Instagram or Facebook, you can find me @godsgiftofcreativity on either platform.
Thanks for creating with me!
-Chelsey
Hi there! I’m Chelsey!
Welcome to my blog God’s Gift of Creativity! Join me as I share my love for crochet, crafts, and cooking and show you how you can do it too!

- Crochet Hexie Flower Coaster Pattern
- Back to Basics Blanket Crochet Pattern

- The Box Stitch: A Beginner Crochet Tutorial


Leave a Reply